Wiring a 4-core speaker cable involves identifying the color-coded conductors (typically red, black, green, white), gathering proper tools including wire strippers and banana plugs, measuring cable length with 10% extra for flexibility, stripping 3/8 inch of insulation from each core, twisting exposed copper strands tightly, maintaining consistent polarity by connecting red wires to positive terminals and black to negative, and testing connections with an audio signal. Proper installation guarantees balanced sound reproduction without phase issues or signal degradation over extended runs.
Key Takeaways
- Choose the correct 14-gauge 4-core cable and measure with 10% extra length for flexibility and routing.
- Strip 4-5cm of outer jacket and 1cm of each conductor, twisting exposed copper strands into tight bundles.
- Identify the color-coded conductors (red, black, green, white) to maintain consistent channel connections.
- Connect red conductors to positive terminals and black to negative terminals at both speaker and amplifier ends.
- Test connections using a mono audio signal and inspect for proper polarity to avoid thin, out-of-phase sound.
Understanding 4-Core Speaker Cable Basics
A 4-core speaker cable represents an advanced wiring solution that contains four distinct conductors within a single cable jacket, offering versatility for complex audio setups beyond standard two-wire configurations. Typically composed of high-quality copper wire, these cables enable specialized installations like bi-wiring or bi-amping, where high and low frequency signals travel through separate conductors for improved sound quality.
When examining speaker wire specifications, a designation such as 14/4 indicates four 14-gauge conductors bundled together, providing sufficient capacity for longer installations while maintaining signal integrity. Speaker cables in this configuration require careful consideration of resistance over extended distances, particularly for runs exceeding 150 feet. The color-coded conductors simplify wiring complexity, allowing installers to maintain consistent channel identification throughout the system, whether implementing paired wiring for multiple speakers or dedicated connections in bi-amped configurations.
Gathering Essential Tools and Materials
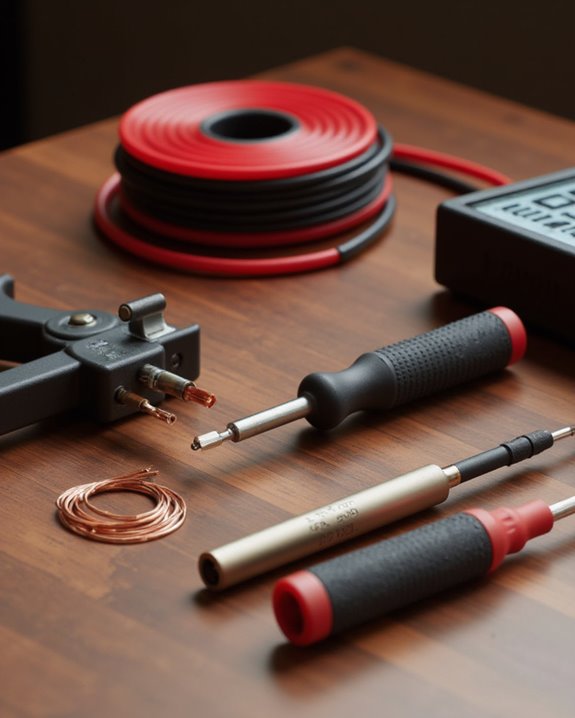
Preparing for a 4-core speaker cable installation begins with gathering all necessary tools and materials, ensuring the wiring process proceeds smoothly without interruptions. A quality wire stripper with a 5.5mm gauge hole allows precise insulation removal without damaging the delicate copper strands beneath. Select appropriate 4-core speaker wires based on installation distance, with heavier 14 AWG recommended for runs exceeding 50 feet to minimize resistance.
Sharp cable snippers provide clean cuts, while adding 10% extra length accommodates necessary slack. Banana plugs, available from retailers like Crutchfield for $3.99, create secure connections and prevent oxidation at termination points. Electrical tape or heat shrink tubing serves the essential function of marking positive and negative conductors, preventing polarity errors that could compromise audio quality and potentially damage equipment during final connection. Proper cable installation also enhances the overall performance of your audio setup by ensuring efficient power transfer, much like optimizing RMS power in powered speakers for sustained, distortion-free sound.
Identifying Wire Purposes and Color Codes
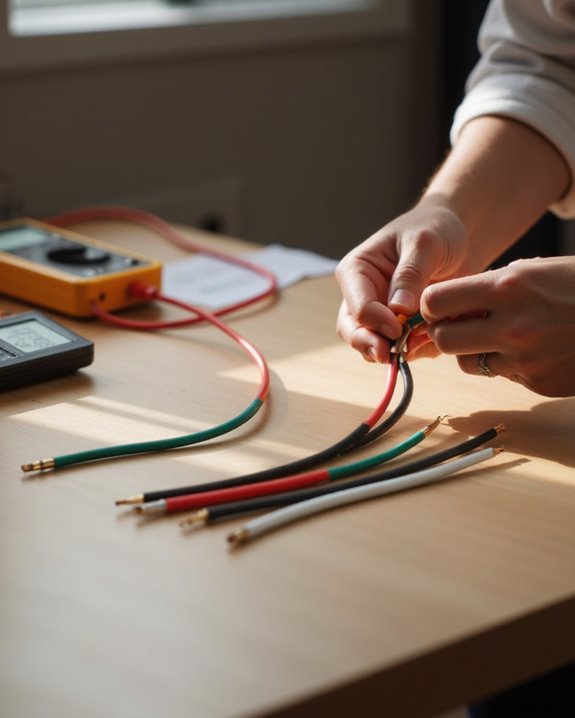
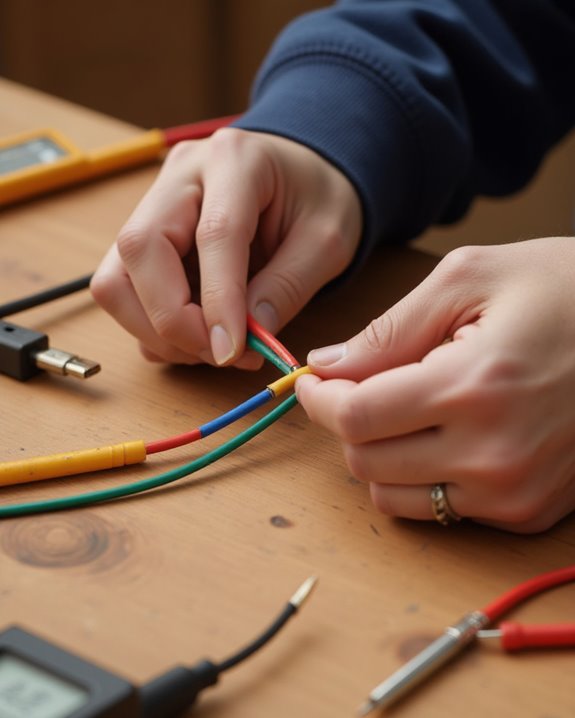
With the proper tools and materials in hand, the next step involves correctly identifying the distinct conductors within a 4-core speaker cable. Most standard 4-core cables feature clear color coding—typically red, black, green, and white—which simplifies the connection process and guarantees best sound quality. Red conductors generally connect to the positive terminal on the speaker, while black connects to the negative terminal.
For bi-wiring setups, the color codes become especially important, with red/black pairs often designated for low frequencies and green/white for high frequencies. When working with non-color-coded cables such as Audioquest Rocket 11, manually trace each conductor and mark them with colored collars or electrical tape. This careful identification prevents cross-channel interference and maintains proper speaker wiring integrity when connecting to the speaker terminals.
Proper wiring techniques also contribute to achieving balanced audio performance, much like the features found in modern wireless speakers designed for on-the-go use.
Measuring and Preparing the Cable

Before connecting any speaker cable to your audio system, precise measurement and proper preparation of the 4-core cable guarantees ideal signal transfer and prevents future complications. When measuring, determine where cables will run wire throughout the room, adding 10% extra length for routing flexibility. Remember to measure twice and cut once, creating equal cable lengths for balanced connections.
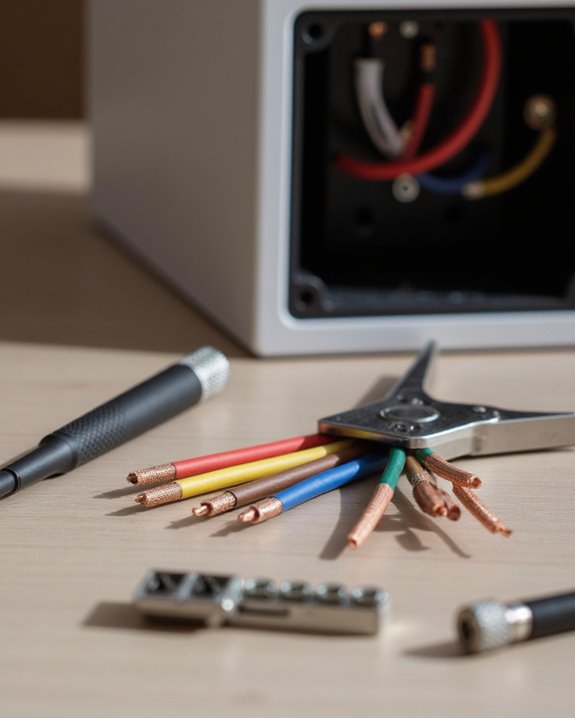
To prepare the cables, strip approximately 4-5cm of the outer jacket using 5.5mm wire strippers on a solid surface. Then expose 1cm of each copper conductor, being careful not to damage the wire. Gently flex the cable before stripping to loosen the jacket, and afterward, twist the exposed strands together into tight bundles. This prevents stray strands from causing shorts when connecting to terminals, ensuring efficient signal transmission. Additionally, proper cable preparation can enhance compatibility with speaker systems featuring True Wireless Stereo capabilities for better multi-speaker setups.
Stripping and Preparing Cable Ends

Proper stripping and preparation of cable ends forms the foundation for reliable speaker connections that deliver best audio performance. When approaching this vital step, technicians should first expose 4-5cm of the inside the cable by removing the outer jacket, being careful not to damage the copper strands that will eventually become bare wire contact points for the terminal on the amp.
For best results, select wire strippers calibrated to different gauges, approximately 5.5mm for standard speaker cabling. Gently flex the cable before stripping to ease jacket separation. After removing 1cm of insulation from each of the four cores (typically red, black, green, and white), twist the exposed copper strands into tight bundles to prevent shorts. This methodical preparation guarantees clean connections, minimizes signal loss, and provides the structural integrity necessary for lasting audio performance.
Connecting to Amplifier Terminals
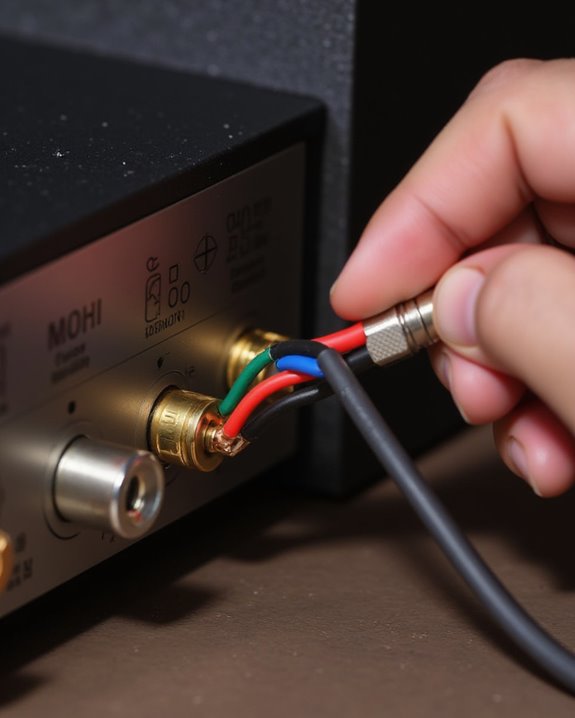
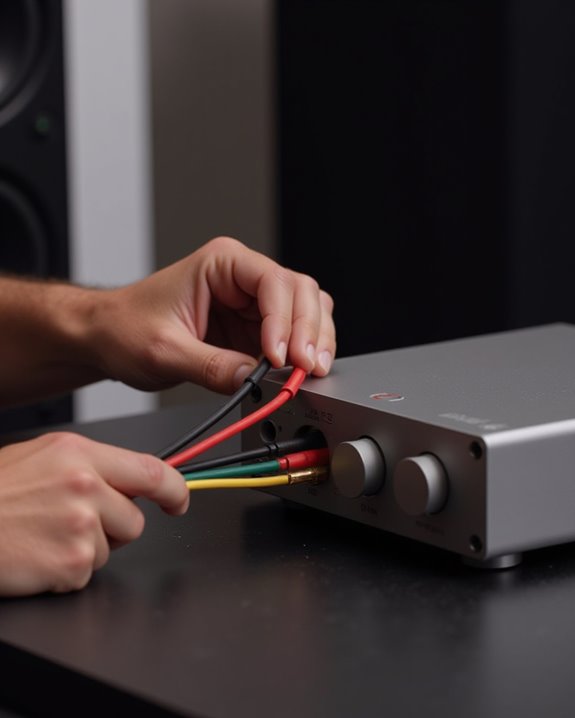
Identifying the correct terminal connections forms the critical link between your speaker cable and amplifier that determines sound quality and system performance. Users should locate the positive (red) and negative (black) cores within the 4-core cable, connecting them to matching amplifier terminals to maintain proper polarity. Banana plugs offer secure insertion into binding posts, creating stable connections with less resistance and minimizing oxidation over time.
For standard setups, firmly tighten the amplifier terminals after inserting the cable cores or connectors to prevent signal loss. When bi-wiring, connect one pair of cores to the main amplifier terminals and the second pair to separate terminals, creating independent signal paths for different frequency ranges. Color-coded pairs should be consistently assigned to left and right channels, ensuring balanced stereo reproduction through properly matched connections.
Routing Cable Safely Through Your Space
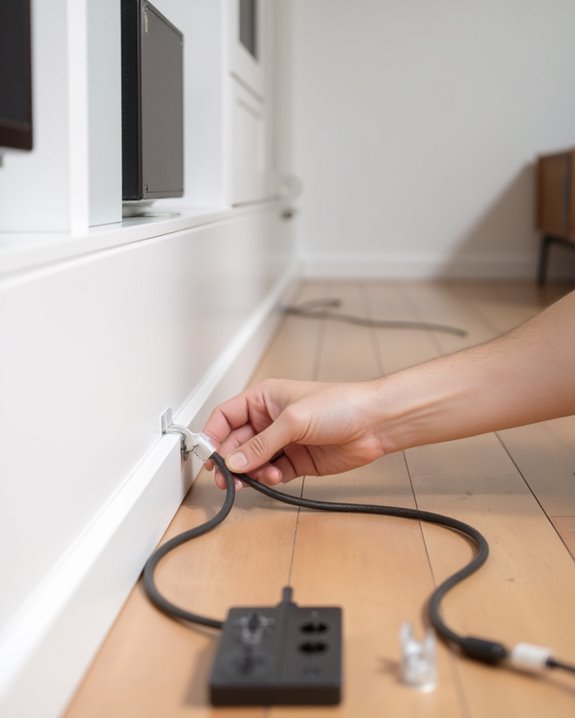
Once the speaker cable connections are properly established at both the amplifier and speaker terminals, carefully planning the cable’s route through your living or outdoor space becomes essential for both aesthetics and safety. For outdoor speaker installations, measure the shortest possible path, avoiding high-traffic areas where the cable might become a tripping hazard. For longer cable runs, consider direct burial options with appropriate protective conduit to shield against moisture and physical damage.
Secure the 4-core cable using Spring clips at 1-2 foot intervals along walls or fences, ensuring it remains taut and unobtrusive. This wiring guide recommends avoiding proximity to power supplies or water features that might cause interference or damage. When routing through structures, use sleeves rated for in-wall installation and follow local electrical codes for permanent installations.
Attaching Cable to Speaker Terminals
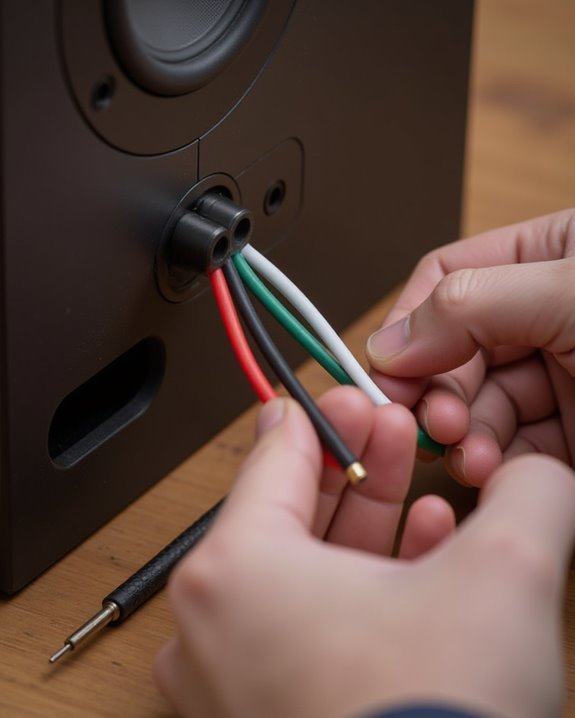
Securing the 4-core speaker cable to your speaker terminals requires precise preparation and careful attention to polarity for ideal sound reproduction. Begin by stripping approximately 3/8 inch of insulation from each core, twisting the exposed copper strands into neat bundles to prevent shorts and guarantee reliability.
For binding posts on your speaker, unscrew the terminal, insert the prepared wire end, and tighten securely. With spring clips, depress the mechanism, insert the single cable end, and release to establish firm contact. Always maintain consistent polarity by connecting red (positive) cores to red terminals and black (negative) cores to black terminals at both ends. When each speaker is wired correctly with matching polarity, the system will deliver properly balanced sound without phase issues. For banana plug connections, apply even pressure and secure any grub screws fully.
Testing Your Connection for Audio Quality
How well does your newly wired 4-core speaker cable actually perform? Begin by testing polarity with a mono audio signal, listening carefully for phase issues that can cause thin sound when one speaker operates out of phase with another. For cables worth their investment in your home audio setup, measure resistance with a multimeter; 14-gauge 4-core cables exceeding 150 feet should read approximately 3.8 ohms, with higher readings potentially causing muffled bass response.
Play a frequency sweep to detect high-frequency roll-off, particularly important for runs longer than 50 feet where frequencies above 10kHz may diminish. Compare volume control capabilities and sound pressure levels before and after installation, as inadequate gauge can reduce output by up to 20%. Finally, evaluate bass clarity through low-frequency test tones, ensuring your good speaker connections maintain crisp, undistorted sound throughout the frequency spectrum.
Maintaining Your Speaker Wire Setup
Regularly maintaining speaker wire connections guarantees best sound quality and system longevity. When inspecting the first speaker in your setup, look for green oxidation on copper strands, especially where Maximum Cable lengths exceed 150 feet. Clean or replace affected sections to preserve ideal signal transfer through one pair of connections.
For setups running a single 4-core cable, protect exposed terminals with banana plugs by inserting twisted copper strands and tightening the grub screw to 80% before final securing. On one side where connections face moisture exposure, apply electrical tape over wire sheathing and liquid tape to crimped connectors. Periodically re-twist exposed copper strands into neat bundles after system adjustments, preventing shorts that compromise audio quality. Monitor 14-gauge wires on longer runs for signs of increased resistance, replacing cables if bass response diminishes.
Frequently Asked Questions
What Is the Color Code for 4 Core Speaker Cable?
Color Codes for 4-core speaker cables follow Core Standards: typically red/black for first pair and white/green for second pair. These Identification Schemes guarantee proper connections despite Wiring Variations across International Norms.
Is It Better to Use Banana Plugs or Bare Wire?
Banana plugs offer benefits of connection reliability and signal integrity, while bare wire presents drawbacks like oxidation and loose connections. For those who value installation ease and consistent performance, banana plugs provide a superior intimate listening experience.
Is It Better to Wire Speakers in Series or Parallel?
While some naively chase series configurations, informed listeners embrace parallel wiring’s superior advantages. Parallel reduces impedance effects, enhances power handling, and maintains signal integrity. Series drawbacks include weaker bass and potential configuration impact if one speaker fails.
How to Connect Speaker Wire Correctly?
Proper speaker wiring requires careful wire stripping, consistent polarity matching with red-to-red and black-to-black connections, secure terminal tightening, thorough insulation checking to prevent shorts, and connection testing before powering the system.